This is a part of a series “Stairway to being an Azure SQL DBA“, which is one stop learning for becoming an Azure SQL DBA.
In the previous blog we saw the difference between Server Admin and AD admin and also how to create them.
This blog is going to be a smaller but important because sometime it is the smallest things which troubles us the most. I Know it from my own experience 🙂
Once you have configured the network configuration for your Azure SQL Database. The next step is to actually connect to your database using SSMS.
SQL Authentication
It is very much the same like you do for any server, enter the “Server name” choose “SQL Server Authentication” as the authentication mode and enter your “Server Admin” username and password.

AAD authentication
If you have AD connect configured for your On-prem with single sign-on configured and is logged in using your domain account or is connected to the Azure VM with the AAD account, you need to choose the Azure Active directory – Integrated option in the SSMS.

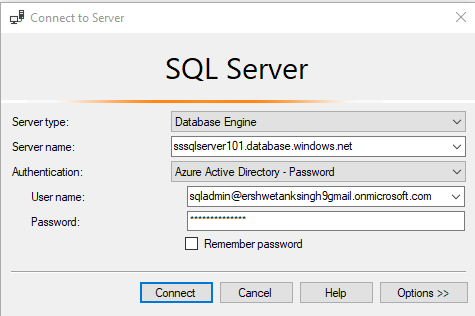
If you are connecting from outside the domain of your subscription, in my case if the machine from where I am opening SSMS is not in the domain ershwetanksingh9gmail.onmicrosoft.com, then I won’t be able to use the “Azure Active Directory – Integrated” and have to use either “Azure Active Directory – Universal with MFA” or “Azure Active Directory – Password”.
When you choose AAD – Password you just need to provide the account by which you will login and the Password for user in AAD.
If you have MFA enabled for your users in AAD then you can use the “Azure Active Directory – Universal with MFA”

When you click on Connect you will get the option to authenticate the way you have chosen, if MFA is not enables then you will get the prompt to login into your Azure account.
That is all for today.
